
We are the original and biggest inflatable boat paint supplier. Buy from us - a trusted name you know.
Inflatable boat paint for inflatable boats, inflatable kayaks, dinghies, inflatable canoes & inflatable boat accessories. Renew your old, faded, sticky, deteriorating inflatable boat with this proven synthetic rubber coating
A picture is worth a thousand words....... below is a happy customer. Watch as their rigid-hulled inflatable boat is easily restored using Tuff-coat inflatable boat repair and restoration paint.
Hypalon Rigid-hull Inflatable Boat (RIB) Restoration Project
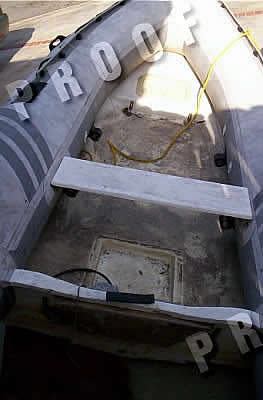
 Before painting |
What was I thinking? I had just purchased a used 12 foot Rigid Inflatable Boat (RIB), manufactured by Alliance in 1993. I knew the boat was in poor shape, but as I dragged it out of the water it became apparent the RIB was worse condition than I had anticipated. Even after I had a diver clean the bottom hull including the inflatable tubes it was still covered from bow to stern in Algae, barnacles and other forms of boat killing sea life. |
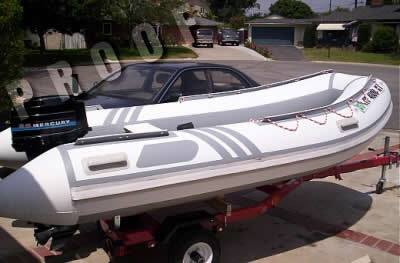
 After painting! |
But I had read about painting inflatable boats It claimed I could re-coat , strengthen and fix my pinhole leaks on my hypalon tubes. As I dragged this stinking boat (yes it did smell badly) home in the back of my father in laws pick up truck, I was sure hoping all the claims were true.
The first step was to clean the boat’s fiberglass hull and hypalon tubes. I started with basic soap and water, then I moved on to “AJAX” powder with a scrub brush. I used “Lime Away” with a scrub brush on the fiberglass decking to remove the hard water deposits and dirt. It worked quite well. The bottom of the tubes were covered with sea life that did not want to depart from there beloved home. I was finally able to remove the toughest crustaceans by sanding them off with a dry wall sandpaper. While I was cleaning the bottom of the boat I also discovered I had blisters on the fiberglass hull, over 450 of them. So while the blisters were still full of water I circled them with permanent ink marker. I then took a hammer and chisel and opened up all the holes to let the water drain. I then chiseled out all the fiberglass that was delaminating. I left the boat in the hot sun for a week before turning right side up. While the hull was drying out it was time to start rebuilding the Hypalon with the SRC base coat. |
 |
After the patching was done I wiped the boat down with Xylene.
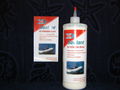
I then proceeded to apply the base coat with an inexpensive brush as I planned on using the brush and then throwing it away afterwards. As long as I made sure I stirred the SRC base coat thoroughly and stirred it occasionally as I placed it on my RIB it went on very, very easily.
- The first coat of base coat was placed only on the areas that needed build up of more than one coat.
- The second coat was placed on the most worn areas.
- The third and final coat covered the entire boat. For the third coat I also used a small 4 inch roller, besides the brush. This gave me a complete even coat of SRC base coat over all the tubes.
Since the boat was upside down and the hull had dried out it was a good time to epoxy the holes I had made when removing the blisters. |
 |
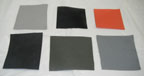
The top coat colors I chose were gray and white, to make the RIB look like it did when it was first manufactured.
My plan was to coat the bottom of the tubes, let the top coat dry, turn it over, then coat the top of the tubes. But when I was applying the base coat it was a little bit of a reach to lean over the tubes and coat the inside. So while the rib was turned upside down and elevated above the ground a couple of feet I crawled underneath the rib and applied the topcoat to the inside of the tubes. (yes, I did wear a respirator )
When the tubes had completely dried I turned the hull over and coated the topside of the tubes.
I found that brushing (a throw away brush) the top coat onto the tubes then using a small 4 inch roller to smooth out the brush strokes gave me a very nice finish. I also discovered that when I put two coats of white topcoat over the gray base coat it looked good. But where I had been sloppy with the gray top-coat and I had to apply 3 layers of white top coat over the gray top coat to cover it sufficiently.
The gray top coat is a very pretty gray.
The white top coat is very, very, white. It looks great, but now I worry about my daughters getting it dirty. After I finished putting on the last of the top coat we waited a few day and drove 350 miles to Lake Mojave, Nevada.
The first day I took the RIB upriver 35 miles. We traveled over 90 miles on the water, just the first day. The next day we had high winds and 4 foot seas, in the lake! But we stilled played all day. I then put the RIB back on the trailer and drove 350 miles home. A couple of days later we were in the ocean off the coast of Long Beach, CA. having a great time.
The coating held up perfectly.
While we were stuck in traffic a big rig kept honking his horn at us. He wanted to know how fast the boat was and how much did it cost. It looked great and he thought it would be fun to have one on the lake. Next stop a week at lake Shasta this coming July. So go out buy Tuff0coat, take your time, prepare well, enjoy yourself and make your old piece of junk look great like mine.
Good Luck and Happy Boating.
Doug
Completed Tuff-Coat RIB Restoration - Like New!

View more restoration pojects in the left-side menu.
Order Now - Online & Secure!
Restore Your Old Inflatable Boat. Renew your old, faded, sticky, deteriorating inflatable boat with this proven synthetic rubber coating. Great for Hypalon and PVC boats of all makes and models.
It can renew and protect your inflatable by adding a layer of strong, UV resistant synthetic rubber that bonds directly with your existing surface - PVC or Hypalon.
Does wonders on Avon, Bombard, Caribe, Quicksilver, Zodiac, and many other inflatables. Add years of pleasure to your investment with Tuff-coat
